The Drip Cap. Essential? Absolutely
August 2019
Ignoring the proper specifications and installation of this little strip of metal can cause big problems
By John F. Koenig
Drip caps are an essential component of a waterproofing system that includes properly installed exterior cladding, trim, a weather-resistive barrier (WRB), and flashing tape. They should be used wherever water can get behind the horizontal edge of an exterior finish material or assembly to help mitigate water intrusion.
Unfortunately, those little strips of metal are often neglected or inadequately specified within a builder’s quality assurance program. That’s because the problems caused by a bad drip cap installation seldom reveal themselves until long after the warranty period ends.
Such latent consequences take the form of rotted sheathing, trim, and siding, or perhaps deeper structural degradation and mold growth. And though the home’s one-year warranty may have expired, your liability and reputation as the builder is still on the hook.
When it comes to drip caps, what we see done right and wrong is consistent among builders, and avoiding mistakes is simply a matter of paying attention to a few key details.
First rule: Avoid the stuff you can buy at the lumberyard, which tends to be thin and flimsy and with a vertical back leg that’s not tall enough to prevent wind-driven rain from forcing its way up and behind the metal barrier.
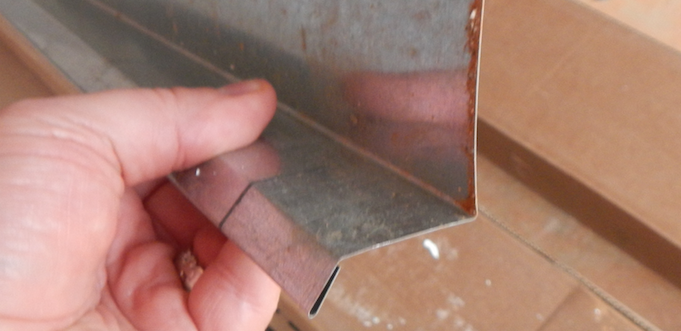
An effective drip cap is a minimum 26-gauge-thick metal with a back leg at least 4 inches tall that’s properly integrated with the WRB or adhered to the drainage plane using flashing tape (see illustration, below), depending on the sequence of your window installation.
Most siding installers today fabricate their own drip caps to ensure these qualities, and you should include and verify those standards in your construction guidelines and details.
To ensure intended performance, the lower edge of the drip cap should lap 1⁄4-inch over the trim it’s protecting and, for best results, should include an outward kick. That additional bend in the drip cap ensures water drips off the edge of the metal rather than being drawn behind it. With that, each end cap should be folded down over the ends of the trim board so rain can’t blow in from the side.
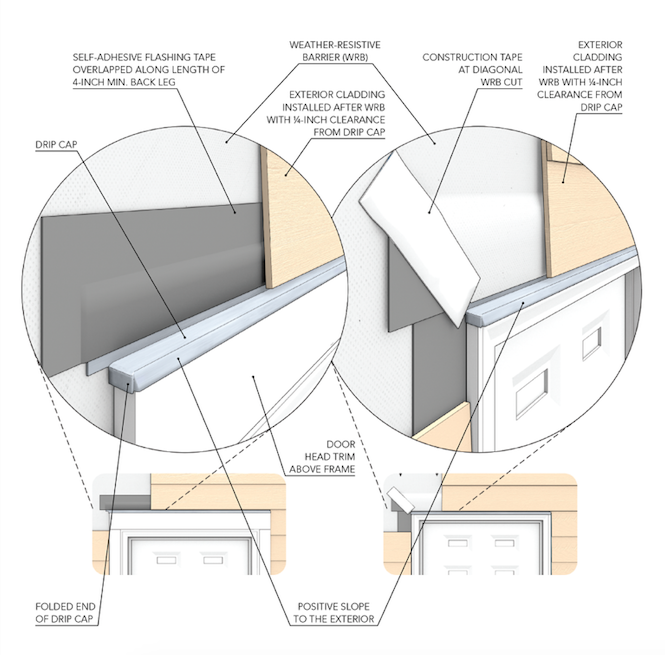
Even where drip caps have been correctly fabricated, I often see them installed with insufficient or negative slope, and with the siding or trim installed tight to the drip cap. You don’t need much slope, but you do need enough to help water drain off.
When you install siding over trim that’s protected by a drip cap, leave a 3/8-to-1⁄4-inch gap between the drip cap and the bottom of the siding.
Unfortunately, I’ve been on a lot of jobs where the bottom edge of the siding rests directly on the drip cap, often because homeowners don’t like the look of the resulting gap.
In that case, explain to both the homeowner and the installer that the gap is necessary to keep the joint from trapping water and is required by the siding manufacturer’s installation instructions. It’s not a hard sell; most people don’t want the house to rot, or be liable for it.
And while it seems obvious not to fill that gap with sealant, I see it done all the time. Simply, if you seal that gap, the water won’t be able to drain out from the exterior cladding assembly and could void the siding manufacturer’s warranty.
The bottom line: Drip caps are not difficult to do right, and doing them right won’t add cost. When you consider the potential for failure that a bit of extra scrutiny can eliminate, drip caps have one of the best returns on investment of any material you specify.
Source: PROFESSION BUILDER